With Love from Santa and Me!
Published
Creating your own Christmas cards makes the traditional festivities feel so special. Here are four super-simple cards to make, with assistance from Santa’s handy little helpers!
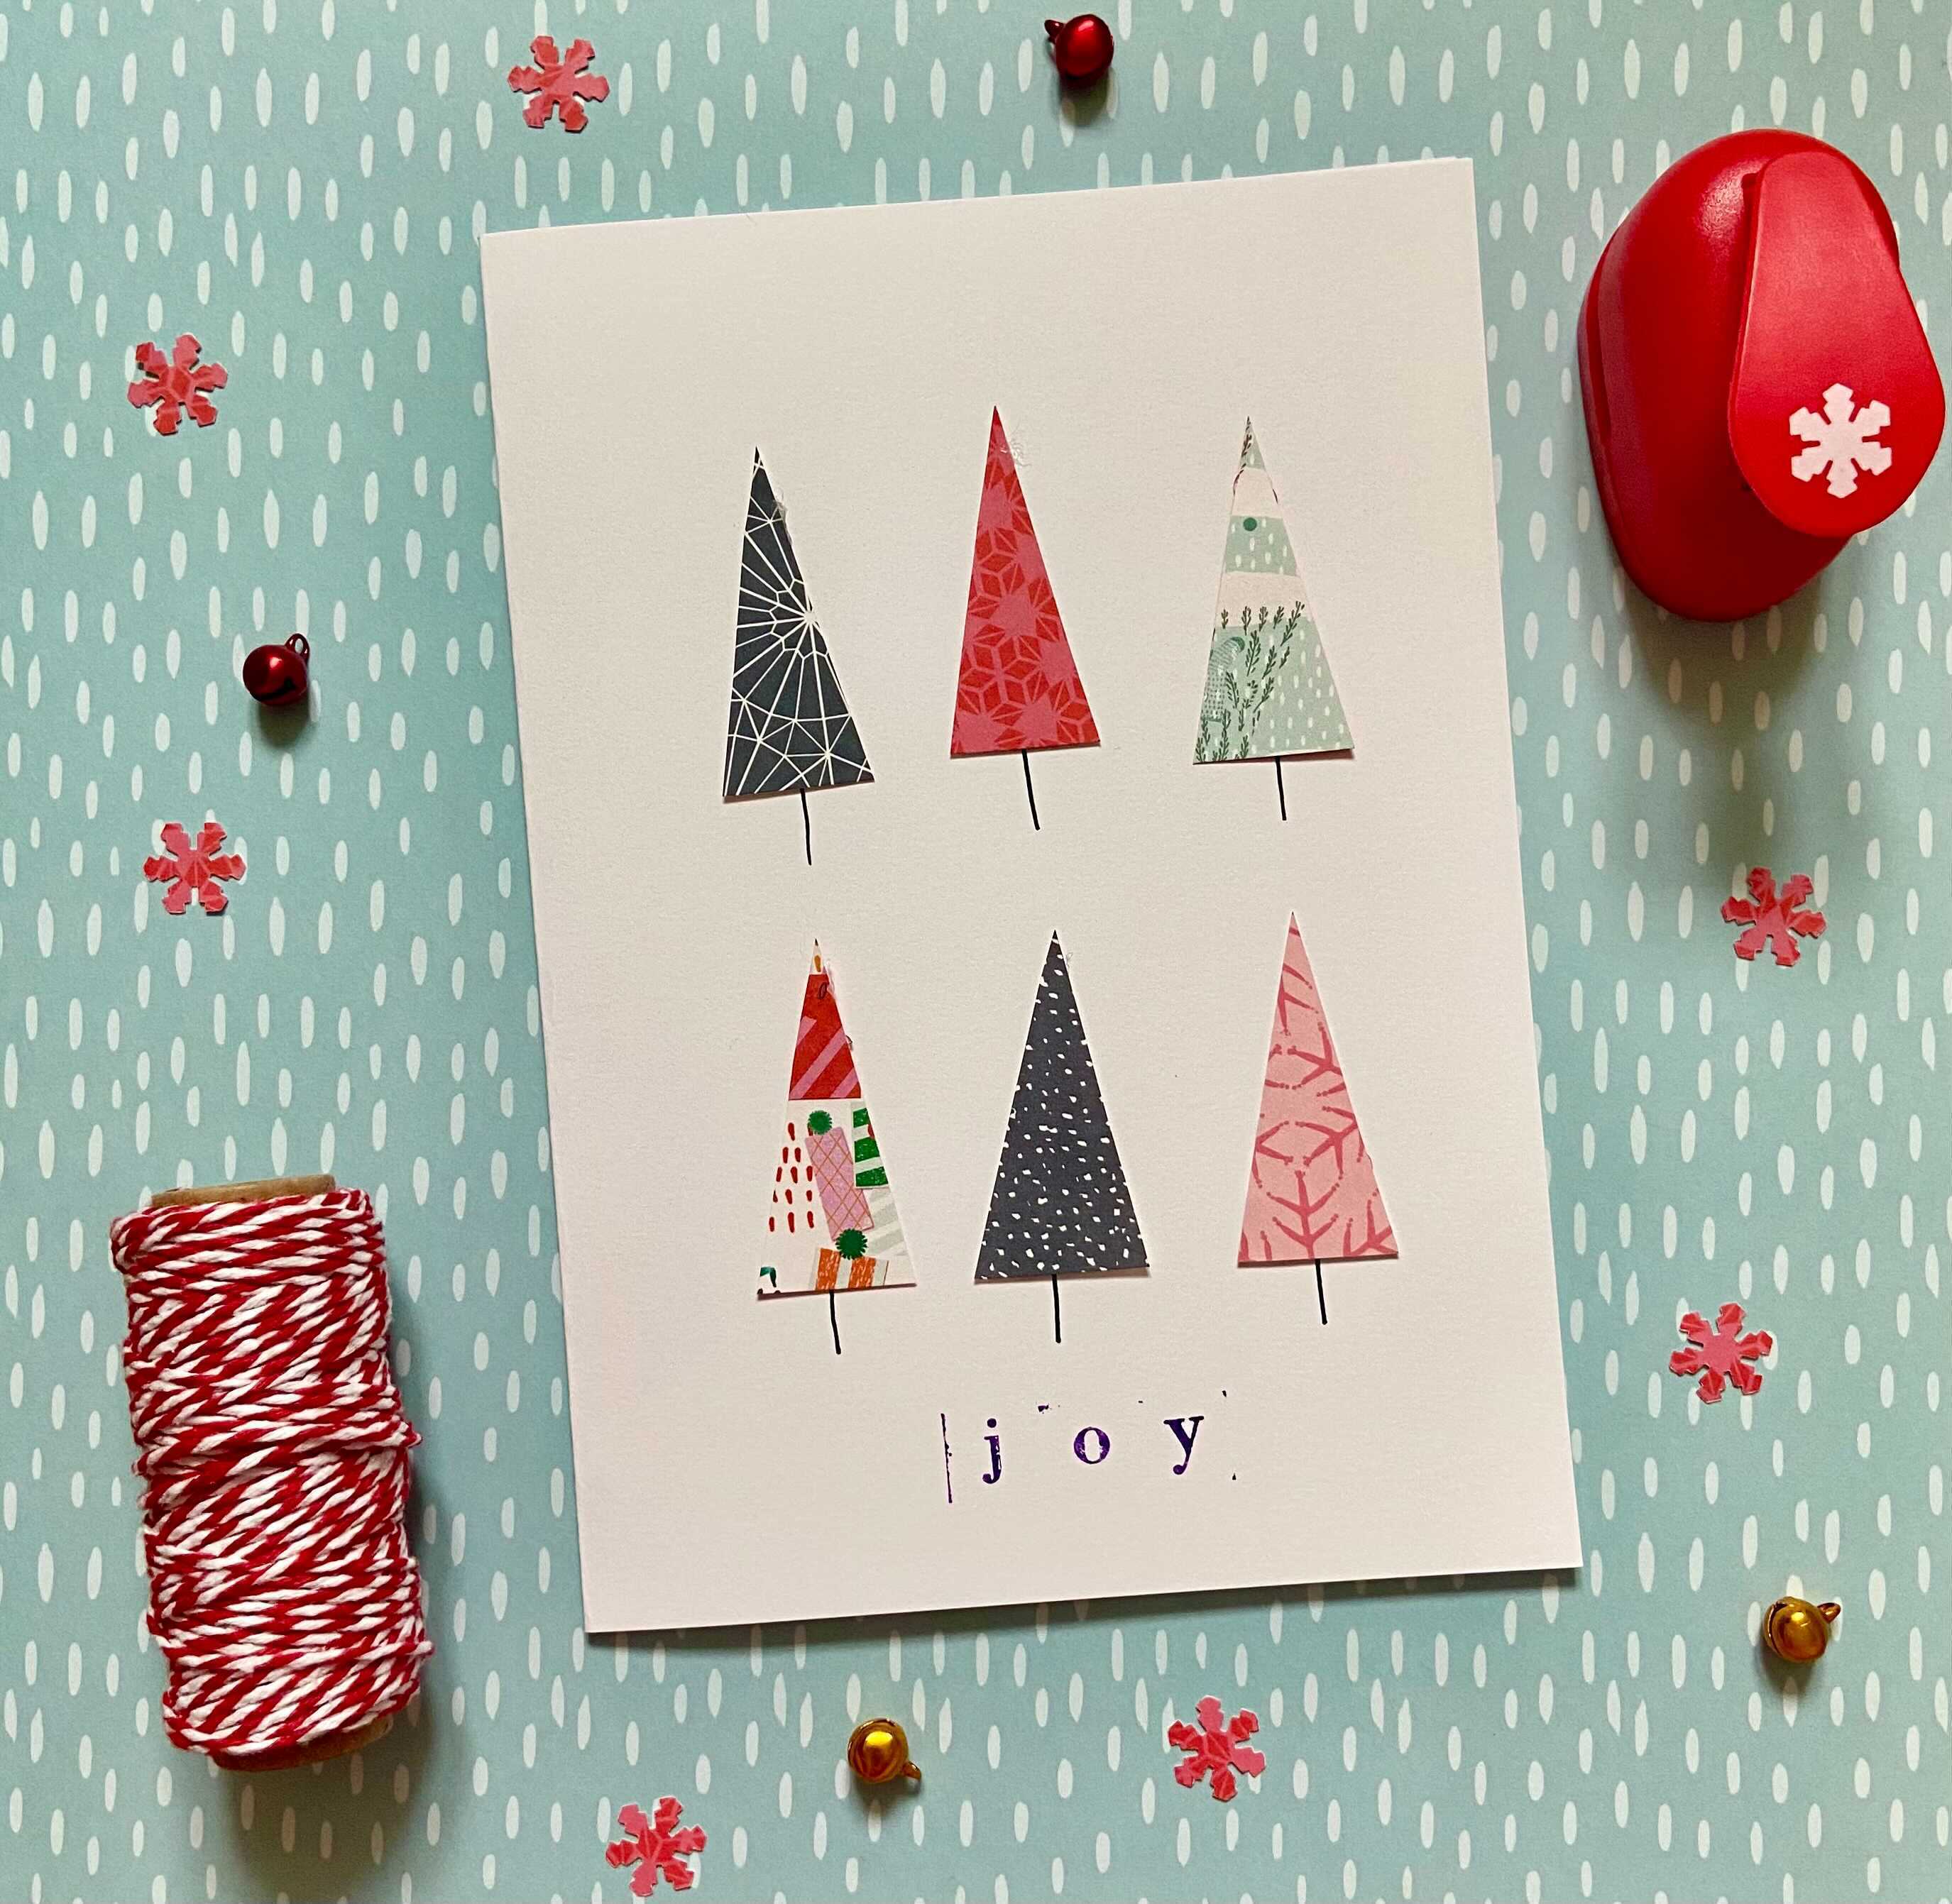
MINIMALIST CHRISTMAS TREE CARD
What you’ll need
- Glue
- Plain greetings cards
- A paper pad
- Pen
- Stamps
1. Cut out your trees – simply cut out long triangles from your paper
pad. Your child should be able to help, depending on age, if you use
child-safe scissors.
2. Next, stick your trees down with glue.
3. Use a fine liner or ballpoint pen to create some delicate lines to make the trunks of your trees.
4.
Finally, get some letter stamps and add your personalised message, then
you’re ready to send your handmade Christmas card to a loved one.

GOOD TWINE-INGS CHRISTMAS CARD
This craft usually includes a hot glue gun, but the same effect can be achieved with a regular glue stick or PVA glue.
What you’ll need
- Plain greetings cards
- Glue or a glue gun
- Coloured string/twine
1. First, you’ll need to decide on your words (tip: shorter words will be much easier!).
2. Now, lightly draw your message out on to the card with a soft pencil.
3.
Begin adding glue along your sketched letters and start to add your
string. Make sure you start adding the string before the glue has dried
(it’s recommended to work in sections).
4. Once you have your full word, all you need to do is snip off any excess string.
This
technique also works well with glitter: create your work in glue and
add glitter to leave a super sparkly message behind (just beware of the
clean-up!).
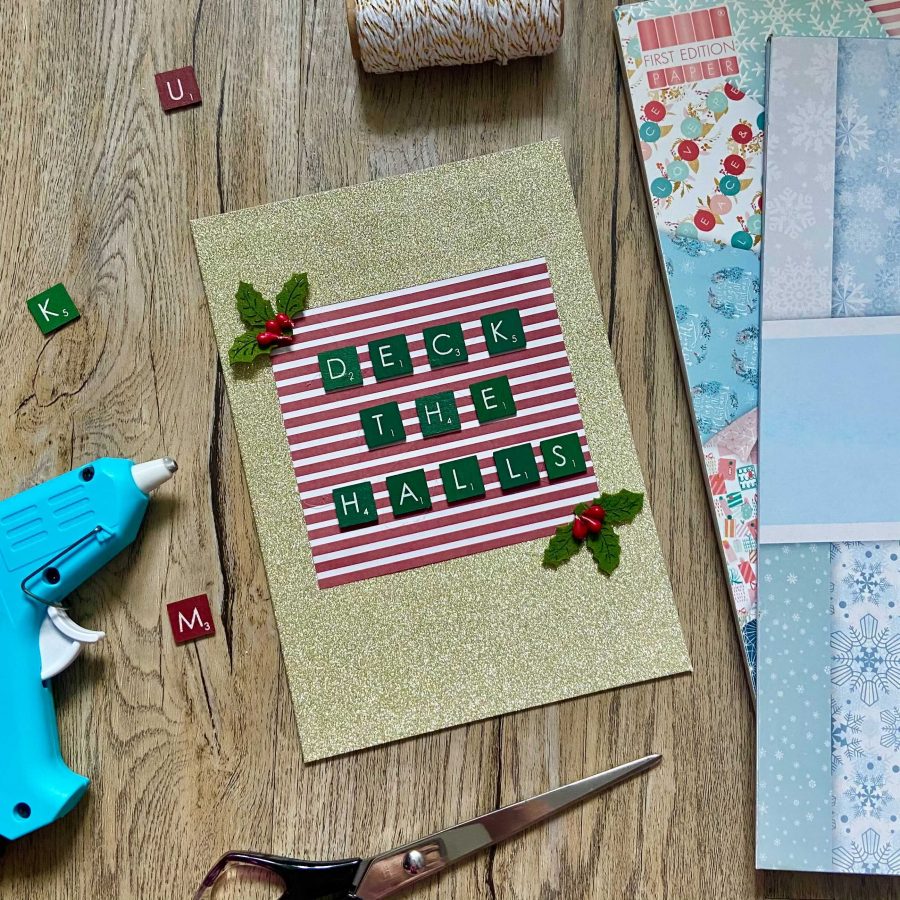
DECK THE HALLS CHRISTMAS CARD
What you’ll need
- Glitter greetings cards
- A paper pad
- Wooden letter tiles
- Glue
- Felt holly embellishments
1. Make sure you have felt holly, and any other festive
embellishments you want to include, to hand. Then cut your paper to size
so it will fit nicely within your card.
2. Find all the letters for the message you have chosen to write.
3.
Now it’s just a case of putting it all together. First stick down your
patterned paper, then arrange and stick down your wooden letters.
Finally, add your holly embellishments.
uk
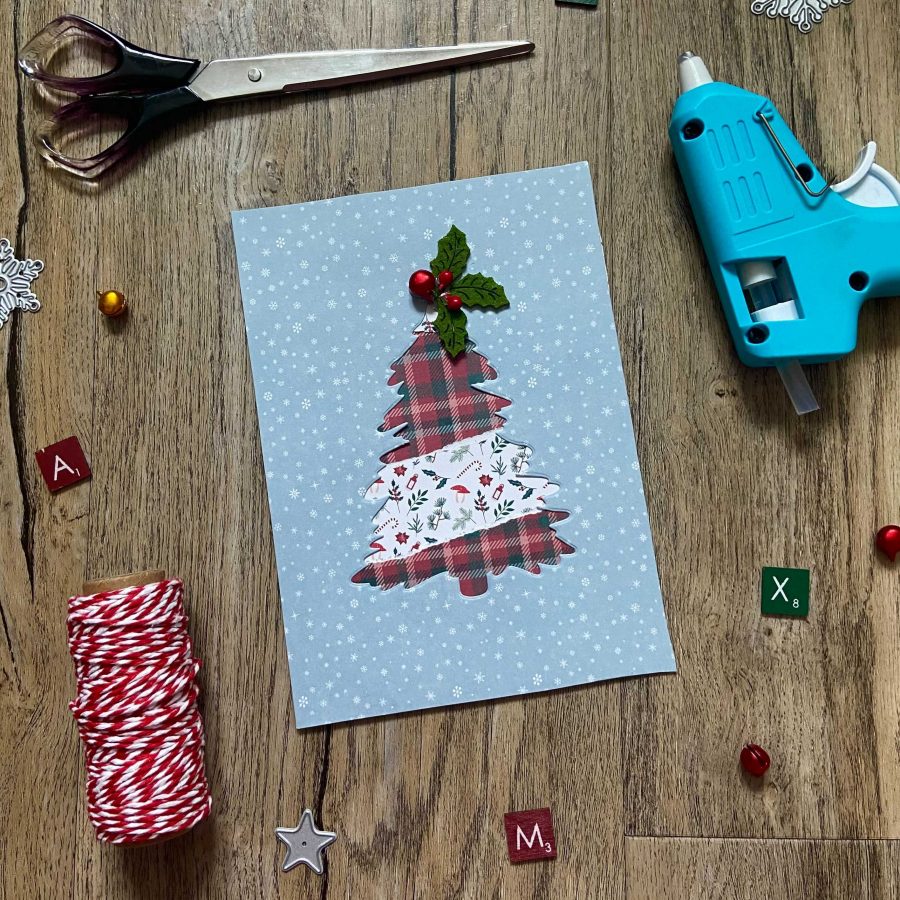
UNDER THE TREE CHRISTMAS CARD
What you’ll need
- Coloured and plain card
- Christmas tree die and die cutting machine or scissors (optional)
- Glue
- Felt holly embellishments
1. Start by ripping pieces of your coloured card – kids love this part and you don’t need to be precise!
2.
Next, start gluing your ripped paper onto the front of your plain card.
Don’t worry about being too neat as it will all come together in the
end.
3. Cut a piece of coloured card to the size of your plain card and cut out the shape of a tree from the centre.
4. Make a tree shape freehand (you can use a die cutting machine and a tree die if you have one, but freehand is simple too).
5. Stick the card with the tree shape cut out over your ripped paper design and you have a super simple Christmas card!
6. You can add extra embellishments like holly or stars.
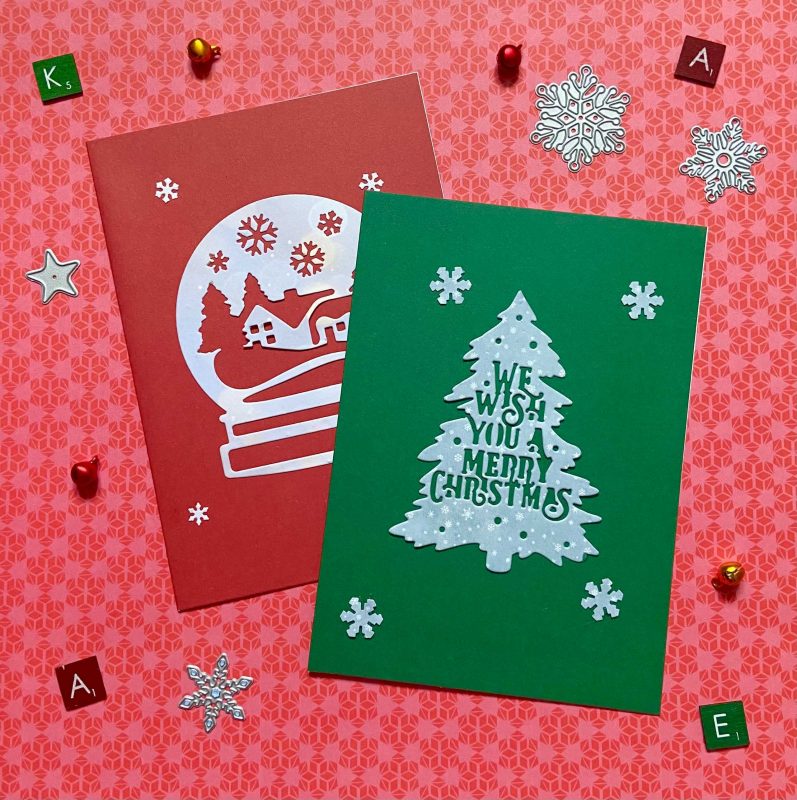
DIE CUT CHRISTMAS CARDS
These simple cards use a die cutting machine. Find your favourite Christmas die and paper pad - we used a wintery snow globe and a Christmas tree with snowy paper.
What you’ll need
- Green and red greetings cards
- A paper pad
- Christmassy dies
- A die cutting machine
- Snowflake hole punch or scissors
- Glue
1. Take your plain Christmas card, then use your die cutting machine to make your Christmassy shape in the paper of your choice.
2. Glue the shape onto the centre of your card.
3. Add some festive snowflake shapes around your shape.
*Our
Christmas card designs were created by The Works, the leading
family-friendly retailer of value gifts, arts, crafts, toys, books and
stationery, with over 534 stores throughout the UK.
Visit www.theworks.co.uk